Fiber optic splicing is one of the fiber optic terminations which creates a permanent joint between the two fibers. With the benefits of low light loss and back reflection, fiber optic splicing is a preferred method when the cable runs are too long for a single length of fiber or then joining two different types of cables together. There are two methods of splicing, fusion splicing and mechanical splicing.
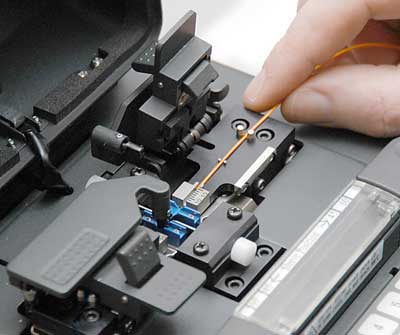
In fusion splicing (as following picture), a machine called fusion splicer is used to precisely align the two fiber ends. Then the glass ends are “fused” or “welded” together using some type of heat or electric arc. This produces a permanent connection between the fibers enabling very low loss light transmission (Typical loss: 0.1 dB). Fusion splicing has the best return loss performance of all the mating and splicing techniques.
- Prepare the fiber. Strip the protective coatings, jackets, tubes, strength members, etc. and only leave the bare fiber showing. Please pay attention to keep the fiber clean.
- Cleave the fiber. Choose a good fiber cleaver. The cleaved end must be mirror-smooth and perpendicular to the fiber axis to obtain a proper splice. But the cleaver is not used to cut the fiber. It’s only used to produce a cleaved end that is as perpendicular as possible.
- Fuse the fiber. Align the fusion splicer unit and use an electrical arc to melt the fibers, permanently welding the two fiber ends together. Alignment can be manual or automatic.
- Protect the fiber – To ensure the splice not break during normal handling, you must protect the fiber from bending and tensile forces. A typical fusion splice has a tensile strength between 0.5 and 1.5 lbs and will not break during normal handling but it still requires protection from excessive bending and pulling forces.
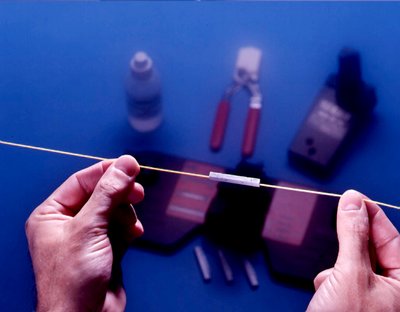
Mechanical splicing (as following picture) aligns and mates the end face of two cleaned and cleaved fiber tip together. It’s a reusable splice. The mechanical splice will have an index matching fluid that eliminates the fiber-to-air interface, there by resulting in less back reflections. Mechanical splices are often used when splices need to be made quickly and easily.
- Prepare the fiber. Strip the protective coatings, jackets, tubes, strength members, etc. and only leave the bare fiber showing. Please pay attention to keep the fiber clean.
- Cleave the fiber. This one is the same to the fusion splicing step. But the cleave precision is as critical.
- Mechanically join the fibers. This method doesn’t use heat. Simply put the fiber ends together inside the mechanical splice unit. The index matching fluid inside the mechanical splice apparatus will help couple the light from one fiber end to the other. Older apparatus will have an epoxy rather than the index matching fluid holding the cores together.
- Protect the fiber – the completed mechanical splice provides its own protection for the splice.
To decide which fiber splicing method you should choose, you may take two important factors into consideration. First, it’s the cost. Mechanical splicing has a low initial investment ($1,000—$2,000) but costs more per splice ($12-$40 each). While the initial investment is about at least $15,000 and per splice cost is about $0.50 – $1.50. Second, it’s the performance. Fusion splicing offers a high degree performance of lower loss and less back reflection than mechanical splicing.
By the comparison of the cost and performance of two methods, now you know which one is suitable for your applications. If you have enough money and need more precise alignment for lower loss, you could buy a fusion splicing machine. If you just have a small budget and should make a quick splice, then you can choose mechanical fiber optic splice.

